As I work on rebuilding my model railroad, one of the most significant changes I’m making is switching from a through station to a stub-end station. This decision isn’t just about practicality; it’s also about enhancing the theme of my layout. For those who might not know, a stub-end station is where tracks end at the station instead of passing through. This change is opening up some new possibilities, both for how I run the trains and how the whole setup looks.
Why the Shift to Stub-End Stations?
The main reason for this change is space. Through stations look great and make sense in certain setups, but they need tracks to come in and out on both sides, which takes up a lot of room. By moving to a stub-end station, I’m getting back about 30% more space, which is a big deal in my shelf layout that’s built in an L shape.
Space has always been a challenge in model railroading, especially when you’re trying to make something that’s both visually interesting and operationally realistic. My last layout had a through station that, while impressive, created some issues I didn’t anticipate. The biggest one was just how much space it took up—not just in terms of the track length, but also in how everything else had to fit around it. The tracks needing to pass through the station meant I had less room for things like yards and scenery.
I also found that through stations make it harder to store equipment. For example, in a six-platform through station, you have to keep at least two tracks open for continuous operation, which limits how much space you have for staging. A stub-end station, on the other hand, lets you use all the tracks for staging, which is huge for me since I need to store and display a lot of trains.
Incorporating Real-World Inspiration
My interest in stub-end stations really took off when I started looking into different designs, especially those where the station building is at the end of the tracks, perpendicular to the platforms. I like how this looks, and it works well for my setup. Plus, I’ve been learning about how some stations have small maintenance facilities and don’t always need to turn trains around, which is useful for my design.
One of the things I’m excited about with this shift is the chance to bring in features from real-world stations. When I was looking at Pacific Central Station in Vancouver, I noticed how they handle long passenger trains by splitting them across multiple platforms. This is something VIA Rail does with their Canadian service, which I model. I plan to use this technique on my layout, which helps me manage space more effectively.
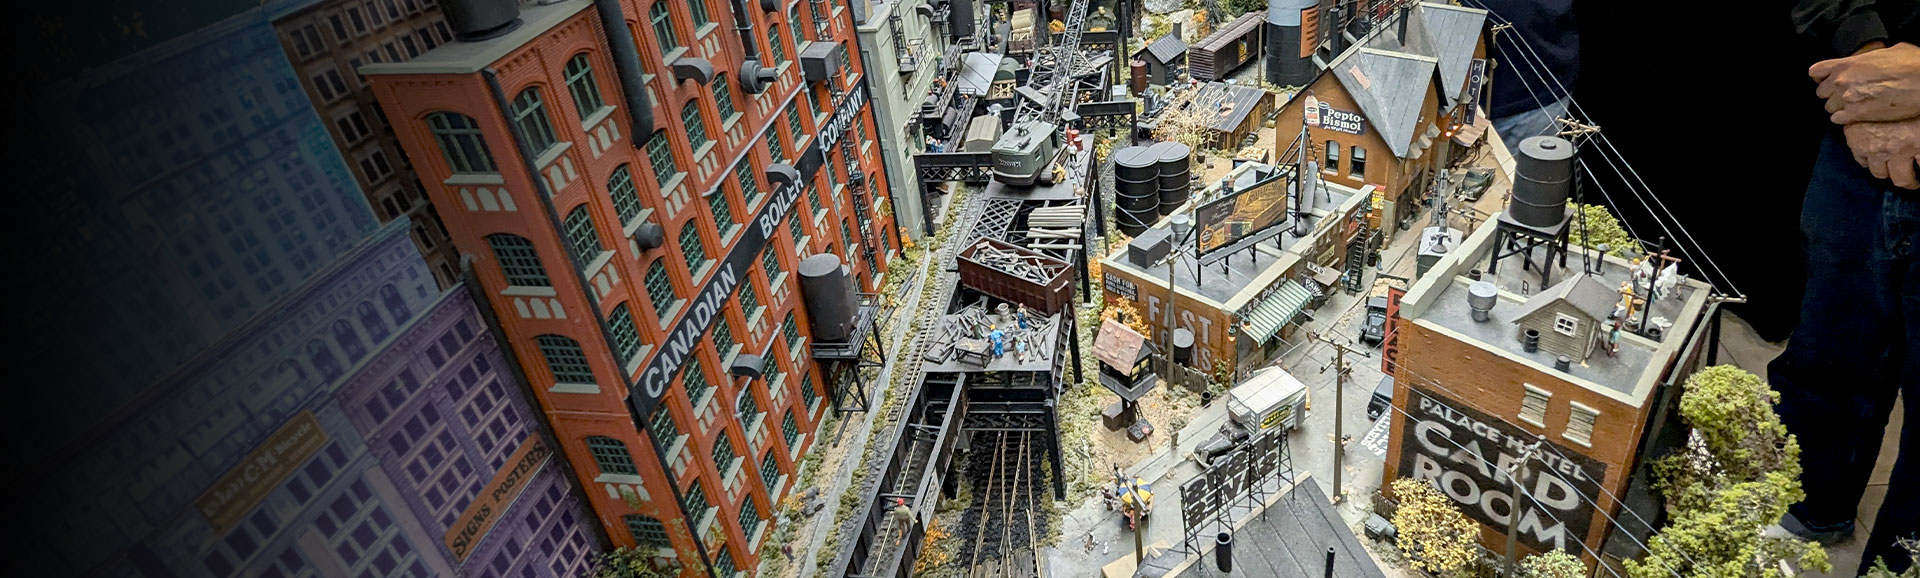
By elevating the station, I can also create the look of a busy city that’s seen better days—skyscrapers towering over crumbling roads and abandoned buildings. This doesn’t just add to the theme I’m going for, but it also helps hide the return loops, which are necessary for continuous operation but don’t always look great. The loops can be tucked away under the cityscape, making them less noticeable and more in line with the overall vibe.
Balancing Aesthetics and Operations
One of the main challenges I’m facing is how to balance the operational needs with the look I want. For example, I want my GO Transit equipment to keep running continuously, but my VIA Rail trains, especially the longer ones, need more careful staging and switching.
To make this work, I’m focusing on creating passenger yards with tracks that are long enough for at least eight passenger cars. This lets me stage longer trains and even split them between platforms like they do at Pacific Central Station. It’s a compromise that lets me enjoy the complexity of operations without losing the visual impact of seeing my trains in action. I’m also trying to be more flexible about how I run things. Instead of sticking strictly to prototypical operations, I’m going to focus more on how the trains look. This way, I can still realistically run the layout, but I’m not tied down if it doesn’t fit with how I want it to look.
Looking Ahead
As I keep working on this project, I’m looking forward to sharing my progress. Whether it’s picking out the best track plan, building the elevated station buildings, or figuring out how to fit Toronto’s Union Station into my layout, I think these steps will be interesting for anyone following along.
One of the next things I’ll be doing is refining the track plan. After my recent video, I got some great suggestions on how to reconfigure the station elements and track planning areas. I’m planning to share these ideas with everyone, either in a post or another video. I’m also thinking about putting up a small post on my website asking people for their favourite stub-end stations across North America. I want to make this a collaborative process, where the audience feels like they’re part of the design.
In future blog posts and videos, I’ll dive deeper into these steps and show how I’m bringing these ideas to life. I’ll also document the process of building the elevated station buildings and how I’m managing to compress major landmarks like Toronto’s Union Station into my layout. For now, I’d love to hear your thoughts and suggestions—whether you’ve got experience with stub-end stations or you just want to see how this layout evolves.