Having ‘planted’ the dead grass, I was left with the problem of how I should model dead leaves and underbrush. The simple solution would have been to go outside and get some dead leaves; however, the foot of snow on top of them was discouraging. As an alternative, I purchased a couple of cheap cigars at the corner store and ground them up in a coffee grinder. Once sifted, the pulverized cigar produced a wonderfully coloured dead-leaf matter! Following on the success of the ground cigars, I ground up some twigs from our gutters. (An ice dam leaked water into the kitchen, and I was forced to climb onto the roof with an axe to remedy the problem!) The twigs are actually part of the leaves from our walnut tree so they are less woody then actual twigs. Once pulverized by the coffee grinder, they produced a wonderful dark mulch of fine ‘branches’. Finally, I hacked at the ground outside until I managed to get a small scraping of dirt from the garden that I dried in the oven, and sifted.
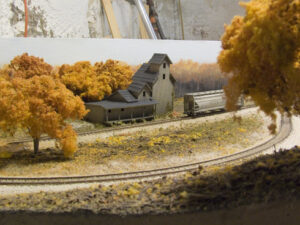
The application of materials was quite straightforward. First, I applied a 50/50 wash of white glue and water to the upper parts of the hill and applied a second coat of static grass ‘ this improved the thickness/density of the previous application and helped to add some variation in the colour. Next, I sifted on some of the fine cigar leaves and then sprinkled on some of the coarser material. Satisfied with the look thus far, I then spooned/sprinkled on some of the ground twigs. I made sure that each successive layer of groundcover receded back from the edge of the previous. With each of the layers of groundcover applied, I misted everything with wet water (water with a drop of detergent added) and drizzled on more of the 50/50 water/glue.
The next day when I looked over the results, I was pleasantly surprised to find that the cigars had actually dyed the glue mixture, and had leached down the hillside. The results added great colour variation to the grass and helped blend the transition between the grass and the underbrush.
I repeated the steps for the areas surrounding the rock faces, but this time elected to add some of the sifted dirt and some small rocks, as well as some ground foam. Again, I was happy with the end results.



0 thoughts on “Groundcover ‘ Part Two”
Chrisitan says:
wow…. Your blog is amazing!
Christian says:
I tried out my self. It really works well!