Keeping with my ambition to construct the majority of the WGR with foam, I have been experimenting with a few different construction techniques in an effort to create foam risers much like those offered by Woodland Scenics. Although my first efforts have been removed due to a change in track plan, the technique I used was very straightforward and fast – allowing me to construct all of my initial bench work in a few evenings.
Step One: Transfer the track plan onto the baseboard, and mark the elevation endpoints. In this example, the track is crossing over itself so the elevation endpoints account for a ‘bridge’ and the track below it.
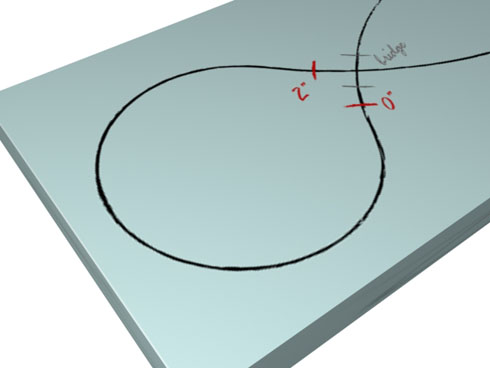
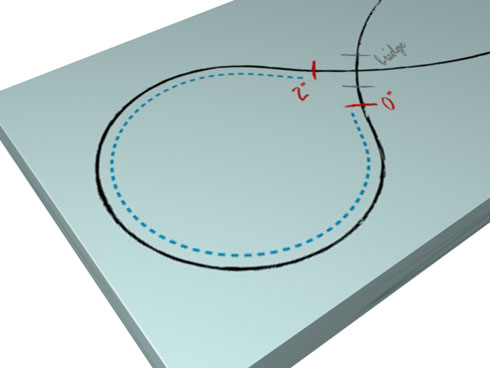
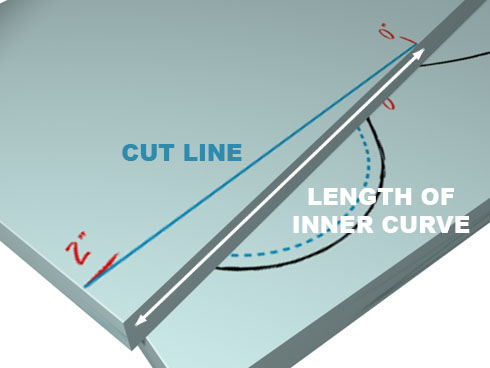
Step Two: Draw a line following the inside curve of the area, offsetting the original centerline by 1″. The 1″ offset allows for the foam (in this case 2″) to follow this new smaller circumference as a guide, so that once installed the risers foam can be easily cantered over the original plan. With this new guide drawn, measure the total length between elevation endpoints using a piece of string.
Step Three: Transfer the length of the string on a new sheet of foam and mark each end with the starting and ending elevations – these elevations should be drawn perpendicular to the riser length – in this case 0″ and 2″. Connecting the two points will create a long wedge that represents the grade between the connecting points.
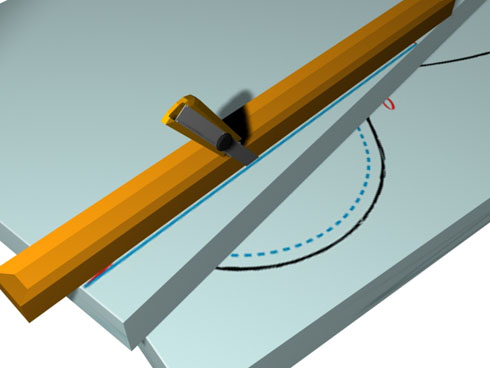
Step Four: Using a sharp utility knife, and a thick straightedge (such as a board or a level) make light cuts by continuously draw the knife through the foam along this line, keeping the knife against the straightedge to ensure the cut is both strait and square.
Step Five: Cut the ‘wedge’ into 2″ long segments
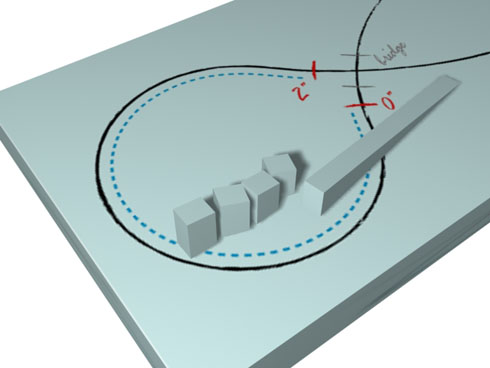
Step Six: Using foam-safe glue such as PL300, affix the wedges along the edge of the inner line – ensuring that each corner touches the next (unlike the illustration), otherwise the resulting grade will be to long.
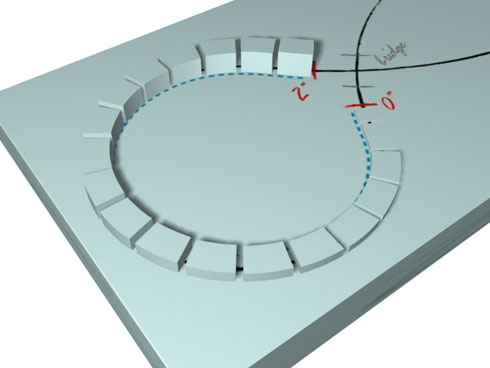
Finally, once the glue has completely dried, any imperfections can be removed by lightly sanding the tops of the risers using a sanding block or rasp.
There you have it – a fast and dirty tutorial on how I created my original grades. Now I just need to get to work on the new plan!