 After having spent some time building the NES, looking at other layouts, and reading about construction techniques, I was convinced that it was possible to build a layout that was almost completely made of foam. Conventional wisdom dictates that layouts be built to museum-quality standard ‘ with heavy-duty wood construction ‘ but often times that is a necessity of building a layout that is, well, heavy-duty. I decided that if I were to attempt to build the WGR using foam exclusively, such construction techniques would be unnecessary as the layout itself wasn’t heavy-duty.
A trip to the local DIY store offered a rather sobering perspective on foam, as extruded foam ‘ the modeller’s foam of choice ‘ was also quite pricey, costing well over $ 25.00 for each 2″ thick 2’x8’ sheet. Needing three sheets of foam for the project, I considered scrapping the whole foam idea in favour of plywood as its cost would be a 1/3rd that of the extruded foam. Just as I was about to commit to some ¼” birch plywood, I noticed a new foam product called Plastispan HD expanded foam. Apparently this newer product is considered mid-grade ‘ better than the standard white foam, but not quite as good as the extruded pink/blue stuff. It is considerably harder than the white bead foam, and much less crumbly. I threw caution to the wind and decided to give it a shot.
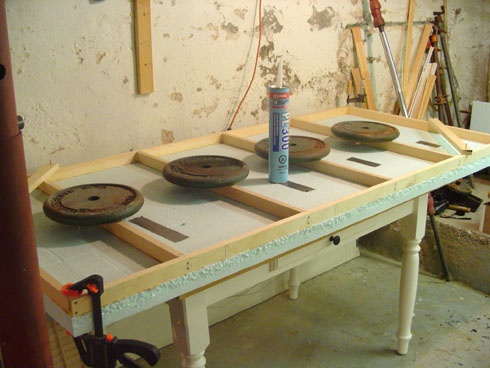
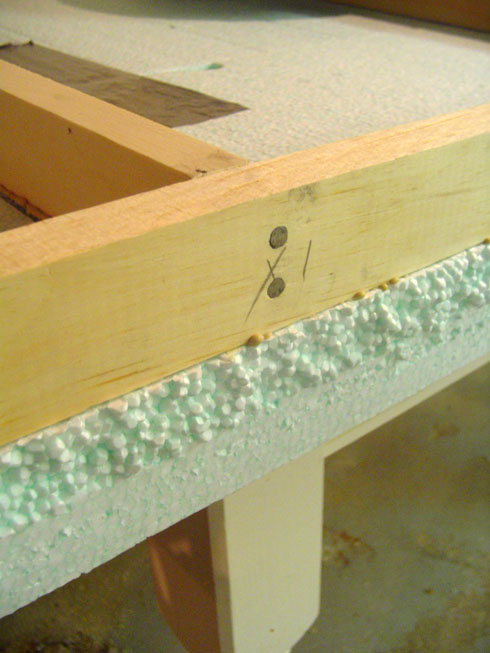
The WGR is 34″x72″, which would have fit on a door, but wanting to stick to my foam commitment, I decided to construct the baseboard out of 1″x2″ pine with support stringers every 16″. I glued and nailed a simple frame together and then attached the sheets of foam using PL300 adhesive, and let the entire assembly dry for a few days.
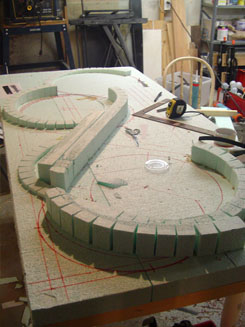
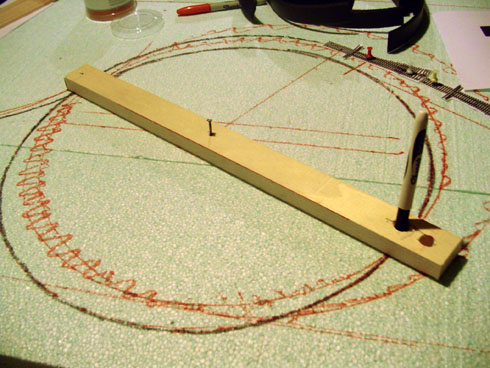
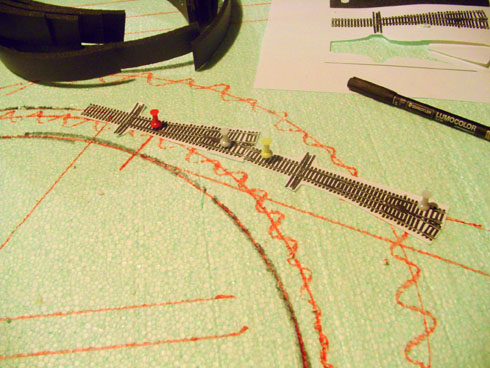
Once dry, I started transferring the track plan onto the baseboard. Using a stick for a compass, and some photocopies of turnouts, I marked, traced and plotted the basic track arrangement. I wasn’t surprised to find that despite the best intentions, the track plan wasn’t going to be a perfect fit, as my turnouts needed more space than estimated. By reversing the turnout arrangement on one section of the wye, and eliminating one of the hidden staging tracks I was able to make everything fit.
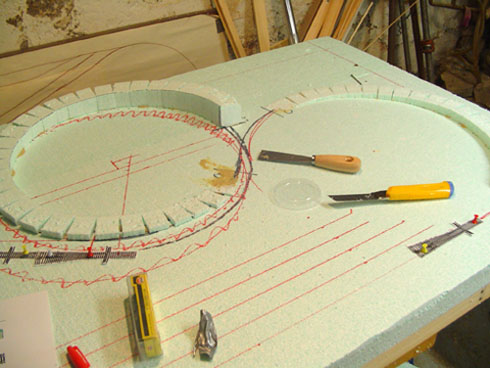
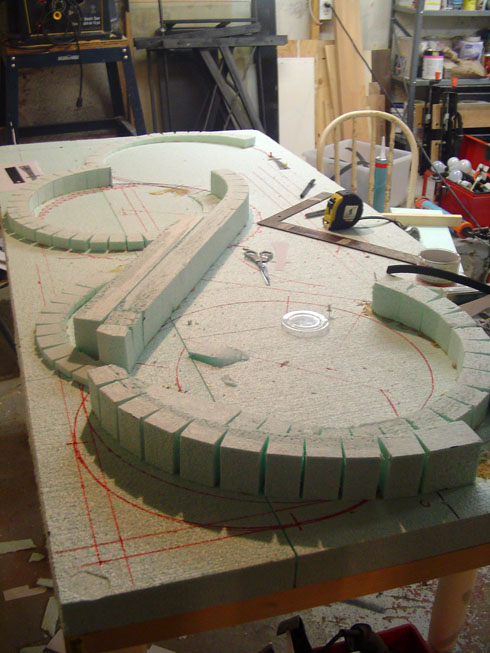
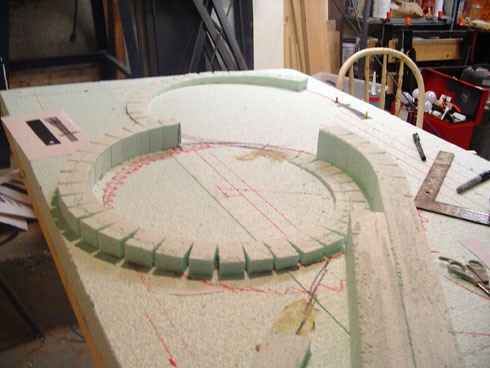
For risers, I opted to use foam ‘ I’ve been looking at the Woodland Scenics foam risers and deiced that it would be straightforward to construct something similar ‘ the advantage being that the cost would be greatly reduced, and I would be able to create custom grades. To make the risers, I measured the length of the curve/strait section of track I was working on and transferred the length on to the foam. I then marked the heights that the grade needed to rise over that distance on the foam and cut the foam into a large wedge. I scored and snapped the foam every inch or so and glued the riser segments to the baseboard ensuring the inside edge was butted tight against one another. Work went quickly, and in the course of three hours, I managed to construct all of the risers seen here.
My mind is already buzzing trying to figure out how to scenic all of these grades. Many will be hidden, but others will need some creative camouflage in order to maintain some believability. That being said, the foam experience thus far has been very positive! Looking forward to the next stages!
0 thoughts on “Foam Benchwork”
Scott says:
Cool! More input. More pictures! Track plan?
😉
Scott
Ken says:
Great Idea! I live in a senior apartment complex and was concerned about the weight of a standard benchwork since I will have to move it frequently. My benchwork is under 10 lbs.!!! More please…